Easy DIY Automatic Watering System for Quail
An automatic watering system is simple to set up, but will save you time in caring for your quail. The DIY watering system will ensure that your quail have access to fresh, clean water at all times without adding another daily chore.
This post contains affiliate links. Read my disclosure policy.

When raising quail, it is important to streamline their care and give the quail access to water at all times without having to fill waterers daily.
Let me show you how to set up an easy DIY automatic watering system for your quail.
What You Need
- 5 gallon bucket
- Bulkhead and ball valve
- Float valve
- Hose attachment
- Plumbers tape
- 3/8″ tubing
- 5/16″ tubing
- 5/16″ to 3/8″ tubing adapter
- Water cups
How to Set Up the Automatic Watering System
1) Get a 5 gallon bucket and drill a 1/2″ hole at the top of the bucket for the float valve. On the other side of the bucket, drill an 1 1/8″ hole about 4″ from the bottom for the bulkhead and ball valve.


2) Next, attach the float valve through the upper hole you drilled in the bucket. The float valve will keep the bucket from over flowing, but allow clean, fresh water to be constantly supplied to your quail.


3) After the float valve is attached, wind a generous amount of plumbers tape around the threads to prevent water from leaking once the hose is attached, then screw on the hose adapter.

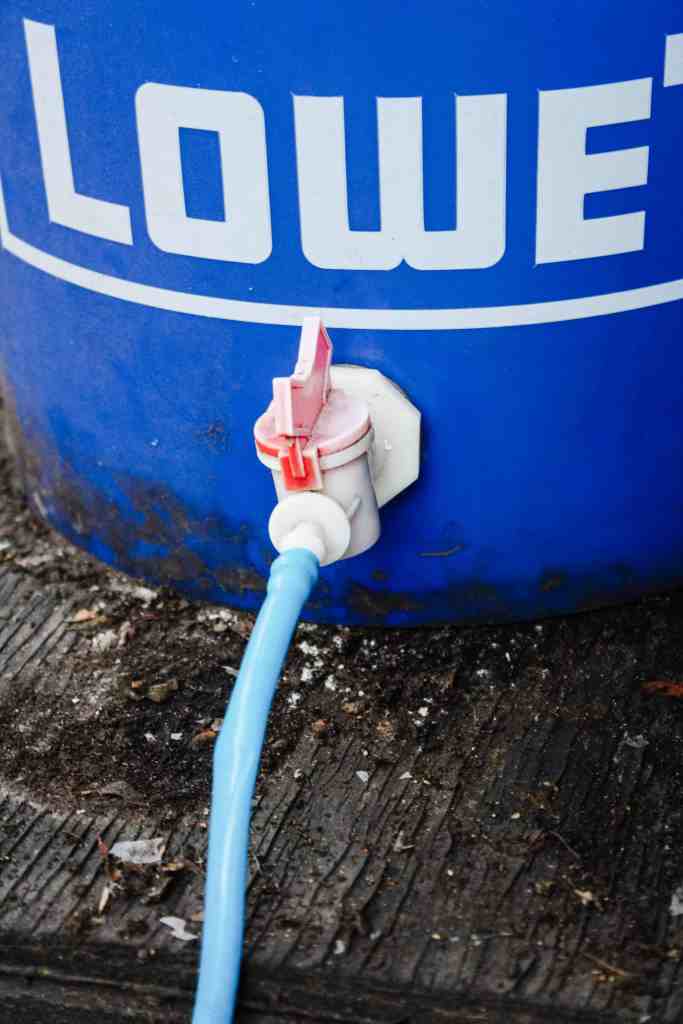
4) In the bottom hole of the bucket, screw on a bulkhead. Add plumbers tape to the ball valve and attach it to the bulkhead.


5) Next, attach the 5/16″ tubing to the ball valve. Elevate the bucket above the cages so that gravity pulls the water down and run the tubing to the cage. Screw the hose to the hose attachment at the top of the bucket.

6) Next, connect the 5/16″ tubing to the 3/8″ tubing using a 5/16″ to 3/8″ tubing adapter. Also, attach the quail water cups to the sides of the enclosure using the screws included in the kit.


7) Run the 3/8″ tubing to each water cup and attach it. Use the splitters to run the tubing to each cup.

8) Turn on the hose and make sure that the water cups begin to fill, but that the bucket doesn’t overflow and none of the bulkheads leak.
This easy automatic watering system for quail keeps your birds supplied with clean, fresh water all day long without adding another daily chore! Healthy birds mean healthy meat and eggs!
Other Posts
Meat Rabbit Set Up for Small Backyards


